Beachy's embedded online booking engine allows you to give your customers a streamlined experience of booking your rental products ahead of time without ever leaving your website. Once Beachy has enabled this feature in your account, you'll need to work with your webmaster or whoever manages updating your website and follow the steps below.
Step 1: Embed our JavaScript tag
First, you'll need to include this line of JavaScript code on all pages where you want to load Beachy's embedded booking engine. Beachy will provide you with your specific subdomain upon request.
<script type="text/javascript"
    src="https://YOUR_SUB_DOMAIN.by.beachyapp.com/assets/scripts/widget.js">
</script>
Step 2: Decide how you want the embedded booking engine to load
Our embedded online booking engine can be configured to load in one of three different ways.
Option 1 - Launch a general shopping experience
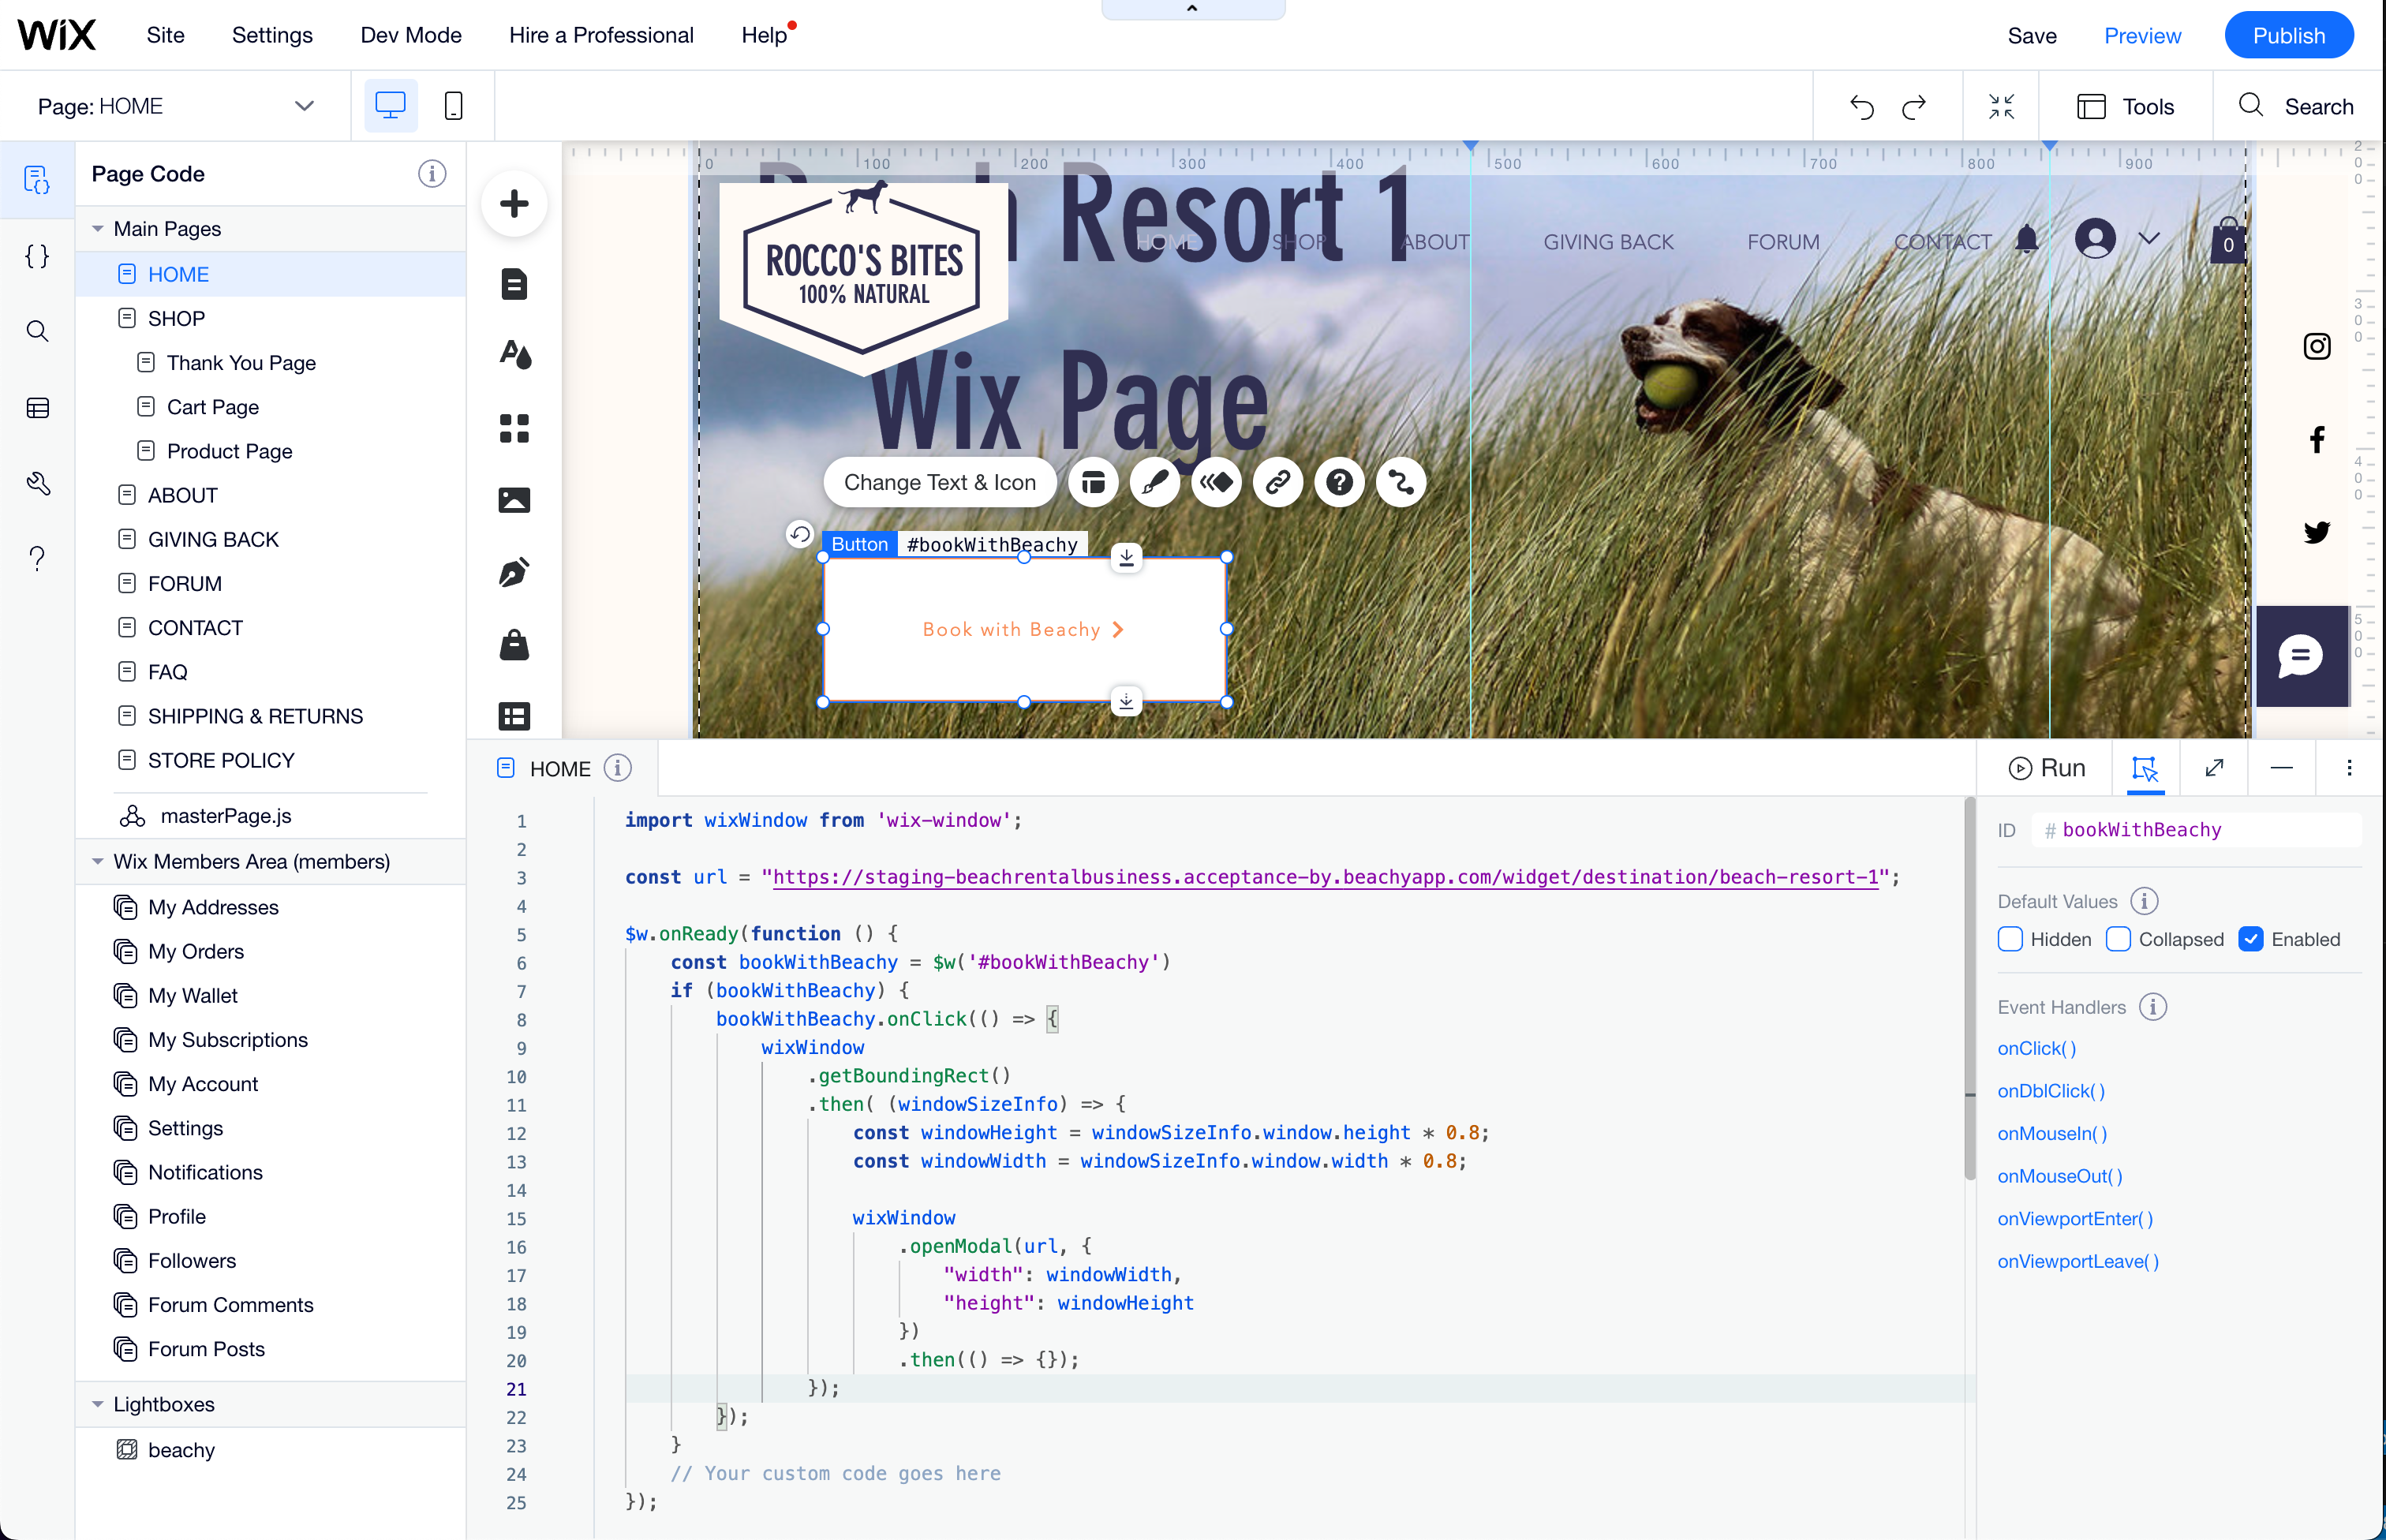
If you want to embed a general shopping experience where customers must choose their destination, dates, and can browse all of your products, you must configure a button on your site as shown in the example here.
<button
     onclick="bookWithBeachy({
       url: 'https://YOUR_SUB_DOMAIN.by.beachyapp.com/widget',})"> Book with Beachy
</button>
Option 2 - Preselect a destination
To preselect a destination for your customers, we simply need to append the destination to the url as shown here. Beachy will provide you with the DESTINATION_SLUG name for your chosen destination.
<button
     onclick="bookWithBeachy({
       url: 'https://YOUR_SUB_DOMAIN.by.beachyapp.com/widget/destination/DESTINATION_SLUG',})"> Book with Beachy
</button>
Option 3 - Preselect a destination and a specific product
For a more streamlined buying experience, you can configure this booking engine to preselect both a destination and a specific product. Work with your Beachy account or support representative to get both the product and destination information needed for this option. Here is an example code snippet for this configuration.
<button
    onclick="bookWithBeachy({
      url: 'https://YOUR_SUB_DOMAIN.by.beachyapp.com/widget/product/PRODUCT_SLUG/destination/DESTINATION_SLUG',})"> Book with Beachy
</button>
Option 4 - Selling retail items
When selling retail items or things like seasonal passes, you can configure an experience that takes your customers directly to the cart for checkout. Your Beachy account or support representative will provide you with the appropriate PRODUCT_SLUG for the item you want to sell.
<button
    onclick="bookWithBeachy({
      url: 'https://YOUR_SUB_DOMAIN.by.beachyapp.com/widget/product/PRODUCT_SLUG',})"> Book with Beachy
</button>
You can also specify a destination in this configuration as well.
<button
    onclick="bookWithBeachy({
      url: 'https://YOUR_SUB_DOMAIN.by.beachyapp.com/widget/product/PRODUCT_SLUG/destination/DESTINATION_SLUG',})"> Book with Beachy
</button>
Step 3: Finish
That's it! Now when your customers click that button, it will load an embedded booking experience with Beachy on your own website. Note that in the code examples shown above, we are displaying just a basic HTML button. You can customize the look and feel of your buttons any way you choose so long as you use the onclick event configured as shown in the examples above.
Comments
0 comments
Please sign in to leave a comment.