Once you have created a product (and schedule for a rental product), you will now assign it to a destination.
1) Select the Destinations tab in the left-hand nav menu.
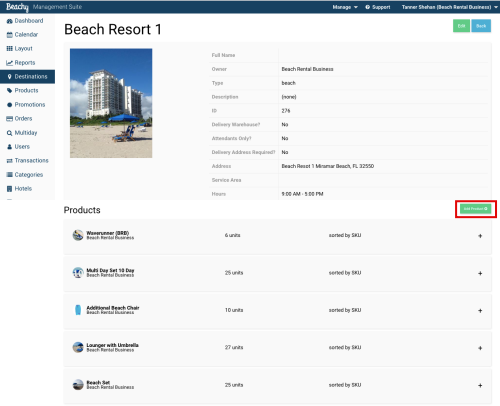
2) Select the Destination to add product.
3) In order to assign a product, select the Add Product button.
This pop-up modal will appear. Select the product to add from the drop-down menu. You can now add the amount of product inventory by typing in the amount or with the up and down arrows on the right.

If the product does not track inventory, put 1 as the inventory count.
After a product has been added to a destination, it becomes available to rent or sell via the attendant app, booking calendar, and web front.
Comments
0 comments
Please sign in to leave a comment.